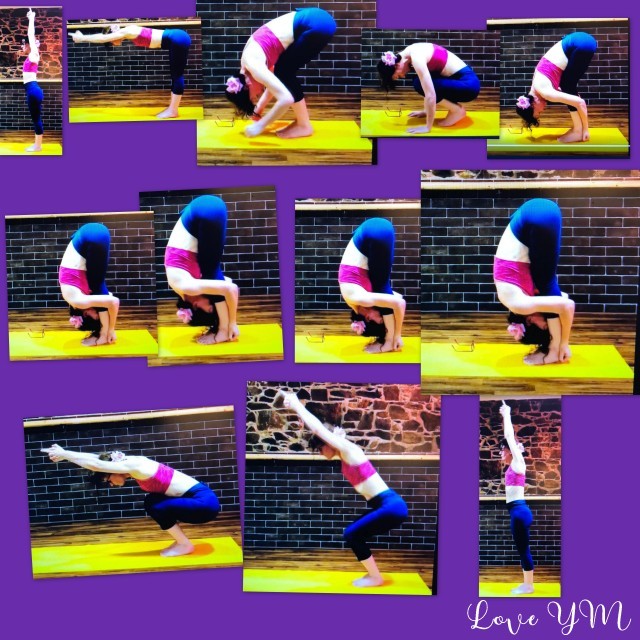
After first backward bend we will still be moving in the Sagittal plane to a posture that is amongst other things, a mild inversion. BUT we pause first {immediate or rapid reversal of the lumber curve is not best Yoga practice}. Our pause at ‘neutral body’ is the safe ‘counter balancing’ pose. At this point, all things being equal (i.e. if no modification required here for your unique body anatomy/mechanics) then engage abs to stabilize the lower back and control the movement and commence forward ‘FOLD’ from the hips ‘in one piece’: natural curves of spine are maintained and central axis is fully aligned/shoulders do not drop or round forward OR to put it another way: try not to round at the waist, try get pelvis to move forward ‘with’ the rest of the spine. Fold as far as you can maintain this form (aim to 90 degrees). After 90degrees you won’t need your abs so much, at this point, if you are new to practice, gravity now becomes your new second best friend (after the heat)! You can employ gravity to help torso/spine lengthen downwards!
At the very least, at the point where your upper body wants to ‘curl’ (dependant on YOUR body mechanics) and you are no longer able to be in ‘one piece tail to head’ without something changing somewhere else THEN sacrifice the straight legs i.e. BEND YOUR KNEES to access more flexion at the hips. Touch hands to the floor (it doesn’t matter where) and wiggle/shimmy into the hips to release/access a bit more depth/space in the hip joints… DO meet your hamstrings in this wiggle/extension of the legs. The majority of resistance to flexion at the hip is tension in the hamstrings. Where leg is extended at back of knee and pelvis is flexed hamstrings are full stretched HOWEVER WITH KNEE BENT MORE FLEXION IS AVAILABLE AT THE PELVIS and we want that now so that you are not ‘depending’ on your lower back here! Bend the knees so you are not hanging downwards from lower spine putting extra weight/stress on your lumbar vertebrae. There are many reasons for variation in length of hamstrings, genetics or ‘habits of use’. For safety, if you have very tight hamstrings if you are still at stage of using ‘gravity’ and your own body weight to access depth then BEND THE KNEES.
Once you have got your grip and stomach thighs together, shoulders away from ears then you can work on ‘wiggling’ into your expression of this posture; when you have reached your best effort, again all things being equal, surrender into the posture.
Spend time on your EXIT SETUP: arms to head, drop the hips, lift the chest, reset the central axis, engage the abs and then ascend. More specifically do not ragdoll up out of this one over straight legs. YOU HAVE TIME. Plenty of it to set up well before you ascend!
For those working with conditions/injuries, modifications can be provided to keep the pose therapeutic for any lumbar instability or anatomical variation. Tension at the back side limits ROM in this one varying degrees body to body. Compression (front side body shape or asis/bone on bone) can limit depth; in this case a simple modification required. From a function point of view it doesn’t matter if your posture doesn’t look like the one in the textbook (remember the person in the textbook is unique, as are you). Ultimately there is no average body really and so we cannot make definitive broad statements about ‘how to’. There are MANY definitions to what makes ‘good’ posture that works for you and is functional. There really are no universal alignment cues: all alignment has a reference to your body not the pose. THIS is why we encourage you to become your own best teachers. The level of intensity that you work at is down to you in the moment. Ultimately, WHAT MATTERS IS how does it ‘feel’.
Love Trisha
go to our Insta or FB page to see the clip of this one in action…
30/1/21